Skip to content

CO2 laser engraving on leather is a process where a focused beam of infrared light (at 10,600 nm wavelength) heats the surface of leather to create permanent marks through carbonization. The laser doesn't "paint" black onto the material — it initiates a controlled chemical reaction that turns the leather's organic compounds dark brown to near-black.
The reason CO2 lasers work so well on leather is basic physics. Leather is an organic material, and organic materials absorb the 10.6 micrometer wavelength efficiently. Fiber lasers, by contrast, are designed for metals and generally don't produce good results on leather.
A CO2 laser can engrave details as fine as 0.1 mm line width (on galvo systems) or achieve 0.1 mm positioning accuracy (on flatbed systems). That's precise enough for intricate mandala patterns, tiny logos, or serial numbers on a wallet.
Why Switch to Laser? The Numbers Don't Lie
If you're currently hand-cutting leather or using die cutting, the comparison is pretty stark. Here's how laser stacks up against traditional methods across the metrics that actually matter:
| Factor | Hand Crafting | Die Cutting | CO2 Laser |
|---|---|---|---|
| Finest detail | Depends on skill | Limited by die precision | 0.1 mm, any vector design |
| Changeover time | Slow (training needed) | 7–14 days (new die required) | Instant — upload file, start cutting |
| Edge finish | Often rough | Requires trimming | Heat-sealed, no post-processing |
| Small-batch cost | High labor | Prohibitive (die amortization) | Same cost per piece, any quantity |
| Material yield | Low (manual nesting) | Low (die gaps) | Smart nesting, 15–30% less waste |
| Complex patterns | Nearly impossible | Die cost explodes | Any vector file, direct to cut |
The changeover time is what gets most people. With die cutting, a new design means ordering a new die and waiting 1–2 weeks. With a laser, you open a file and hit "start."
For small batches especially, laser wins on economics. A custom-engraved wallet that would cost $15–20 in die amortization for a run of 50 pieces costs the same per unit whether you're making 1 or 1,000.
Which Leather Works Best? Material Guide
Not all leather reacts the same way under a CO2 laser. Some types produce beautiful, high-contrast engravings. Others melt, produce toxic fumes, or give you a muddy, low-contrast mess. Here's what you need to know.
Genuine Leather

Genuine leather is a broad category. For laser work, the tanning method matters more than anything else.
Vegetable-tanned leather is the gold standard. It's tanned using natural materials like tree bark, and it engraves with beautiful, consistent contrast. Lighter colors show the best results — think natural tan, light brown, or undyed leather. The carbonization process produces a rich, dark brown mark that's clean and durable.
Chrome-tanned leather is the most common type in the market (used in upholstery, fashion, automotive). It contains chromium salts, which can be problematic under laser. Engraving can release harmful compounds, and results are often less consistent than with vegetable-tanned leather.
Oil-tanned leather is soft and water-resistant, but the dark, oily surface often leads to low-contrast results. It requires more power to get a visible mark, and the engraving may not stand out as well.
Synthetic (Faux) Leather

Synthetic leathers are man-made materials designed to mimic genuine leather. They can be laser-engraved, but with important caveats.
PU (Polyurethane) leather can be laser engraved, but it melts rather than char. This requires careful power settings to avoid a sticky mess. The result is often a subtle, debossed effect with little color change. Cut edges melt-seal nicely, which is a plus.
PVC (Polyvinyl Chloride) leather — never engrave this. When heated by a laser, PVC releases hydrogen chloride gas, which is toxic to inhale and highly corrosive to the expensive metal components inside your laser machine. A supplier who doesn't warn you about this upfront isn't doing their job.
Microfiber leather (like Alcantara) is a higher-end synthetic that engraves well. Alcantara is a polyester + polyristyrene blend with no PVC, so it's laser-safe. The fine fiber structure actually works well with laser processing.
Vehicle Interior Leather
Automotive leather is typically chrome-tanned and often has coatings or treatments. It can be laser-engraved, but you'll need to test your specific material. Results vary more than with vegetable-tanned leather.
Material Compatibility Summary
| Material | Compatibility | Result | Notes |
|---|---|---|---|
| Vegetable-tanned leather | Excellent | Clean edges, high engraving contrast | Best choice for premium work |
| Chrome-tanned leather | Good | Can release compounds; test first | Most common leather type |
| Oil-tanned leather | Fair | Higher power needed, lower contrast | Dark surface limits visibility |
| PU synthetic leather | Good | Cut edges melt-seal, no post-processing | Validated for laser |
| PVC faux leather | Not recommended | Toxic fumes, damages optics | Switch to PU-based alternatives |
| Alcantara (microfiber) | Good | Fine fiber structure, laser-compatible | No PVC, safe to process |
| Rigid leather (3–4 mm) | Good | Higher power, slower speed required | 85–90% power, 10–30 mm/s |
The PVC Warning
This deserves its own section because it's a safety issue. PVC-containing materials release hydrogen chloride gas when lasered. That corrodes your optics and puts your team at risk. A supplier who waits for problems to explain them isn't a supplier — they're a liability.

Not sure what's in your material? Send a sample for free composition testing. Better to know upfront than to discover it the hard way.
How to Get a Dark, Clean Engraving (Not a Burnt Mess)

The number one request from clients is a deep, jet-black engraving. In pursuit of this, the common instinct is to crank the laser power to 100%, believing more power equals a darker mark. This almost always backfires.
Here's why: a laser doesn't "paint" black onto leather. It initiates carbonization — a chemical reaction where the leather's tannins and oils break down and release carbon. That carbon is what creates the dark mark. Push the power beyond the optimal point and you don't get a darker mark. You get a brittle, ashy char that flakes off and ruins the product.
Think of it like toasting bread. There's a perfect point where it turns a rich brown. A little more, and you get black, burnt toast. The same principle applies to leather.
Power Settings by Leather Type
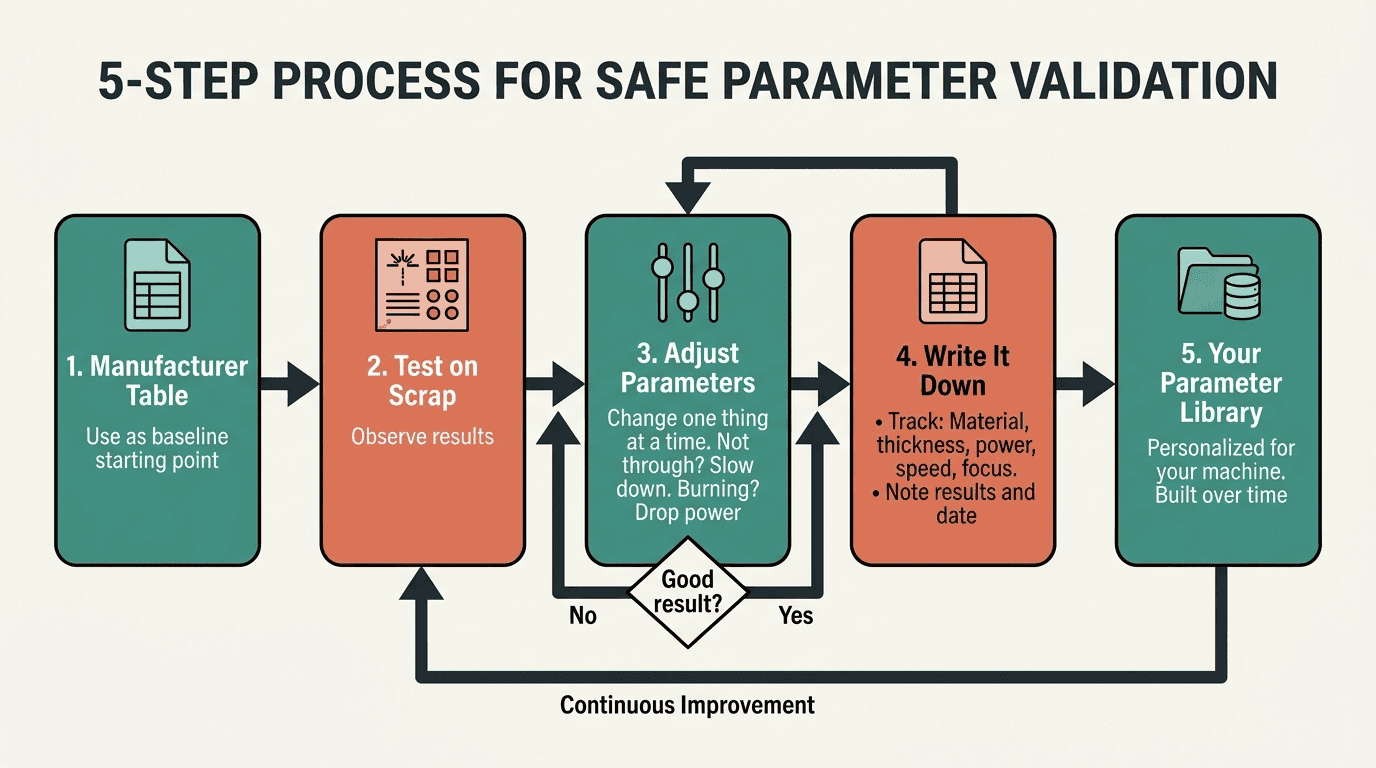
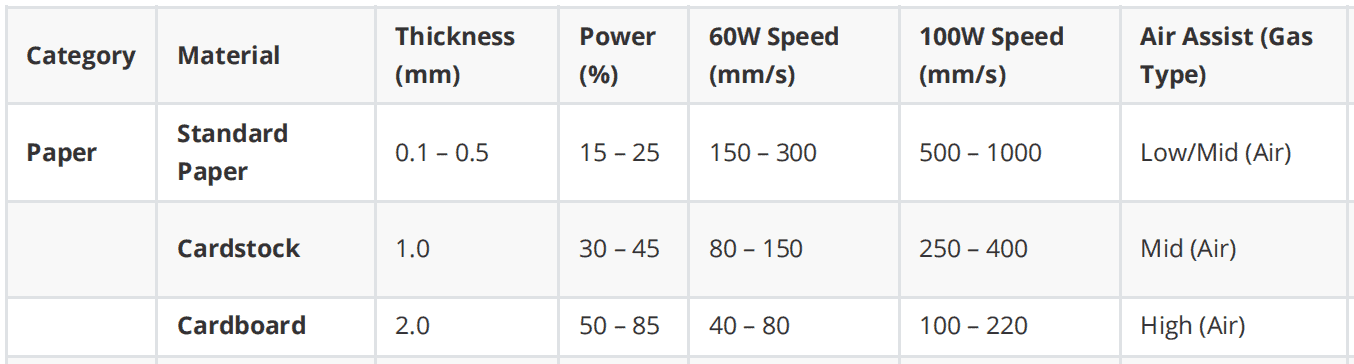
These are validated starting points for 60W–100W CO2 systems. Always run a 5×5 mm test square on scrap material from the same hide before production. Never set power below 15% — most tubes won't fire consistently below that.
Cutting (through-cut)
| Leather Type | Thickness | Power (%) | 60W Speed (mm/s) | 100W Speed (mm/s) | Air Assist | Notes |
|---|---|---|---|---|---|---|
| Natural leather | 1.0–2.0 mm | 45–70 | 15–25 | 30–45 | High | Strong exhaust required for heavy odor. |
| Rigid leather | 3.0–4.0 mm | 85–90 | 10–20 | 20–30 | High | Veg-tanned requires slower speeds. |
Engraving (surface marking)
Engraving uses lower power and higher speed than cutting — the goal is carbonization, not ablation. For natural leather (1.0–2.0 mm), start around 15–25% power at 2–3× the cutting speed and adjust from there. Specific settings vary by leather type, tanning method, and surface treatment — always test first.
For 130W–150W systems
Start from the same power percentages, but increase speed by 30–50% for thin materials (<3 mm) and 20% for thick materials. Always run test cuts first.
Speed-first adjustment strategy
To prevent burning, always favor higher speeds during initial testing. If the material doesn't cut through or mark darkly enough, reduce speed in 10% increments rather than maxing out power. Record your successful settings for each specific supplier — material properties vary by batch.
What Happens at Different Power Levels
| Setting | The Process | The Result | Tactile Feel |
|---|---|---|---|
| Low power / high speed | Light surface ablation | Light brown, tan mark | Smooth, minimal change |
| Optimal power / speed | Controlled carbonization | Dark brown to near-black, clean mark | Smooth, slightly recessed |
| High power / low speed | Overburning and combustion | Brittle, flaky ash on top | Rough, fragile, easily damaged |
Techniques for a Darker Mark (Without Burning)
Instead of increasing power, try these approaches:
Multiple passes. Run the same engraving job two or three times at a lower power setting. This builds up the carbonization layer by layer without overheating the leather. It takes longer, but the result is cleaner and more durable.
Adjust frequency (PPI). On some machines, you can adjust Pulses Per Inch. A higher PPI can create a darker appearance by increasing the density of laser hits per area.
Defocus the laser. Slightly raising the laser's focus point (1–2 mm) widens the beam. This creates a broader, darker mark without the harshness of high power. It's a trick that takes some experimentation but can produce excellent results.
3 Tips for Better Leather Laser Results
These three tips are simple but they make a real difference. Most problems I see come from skipping one of these.
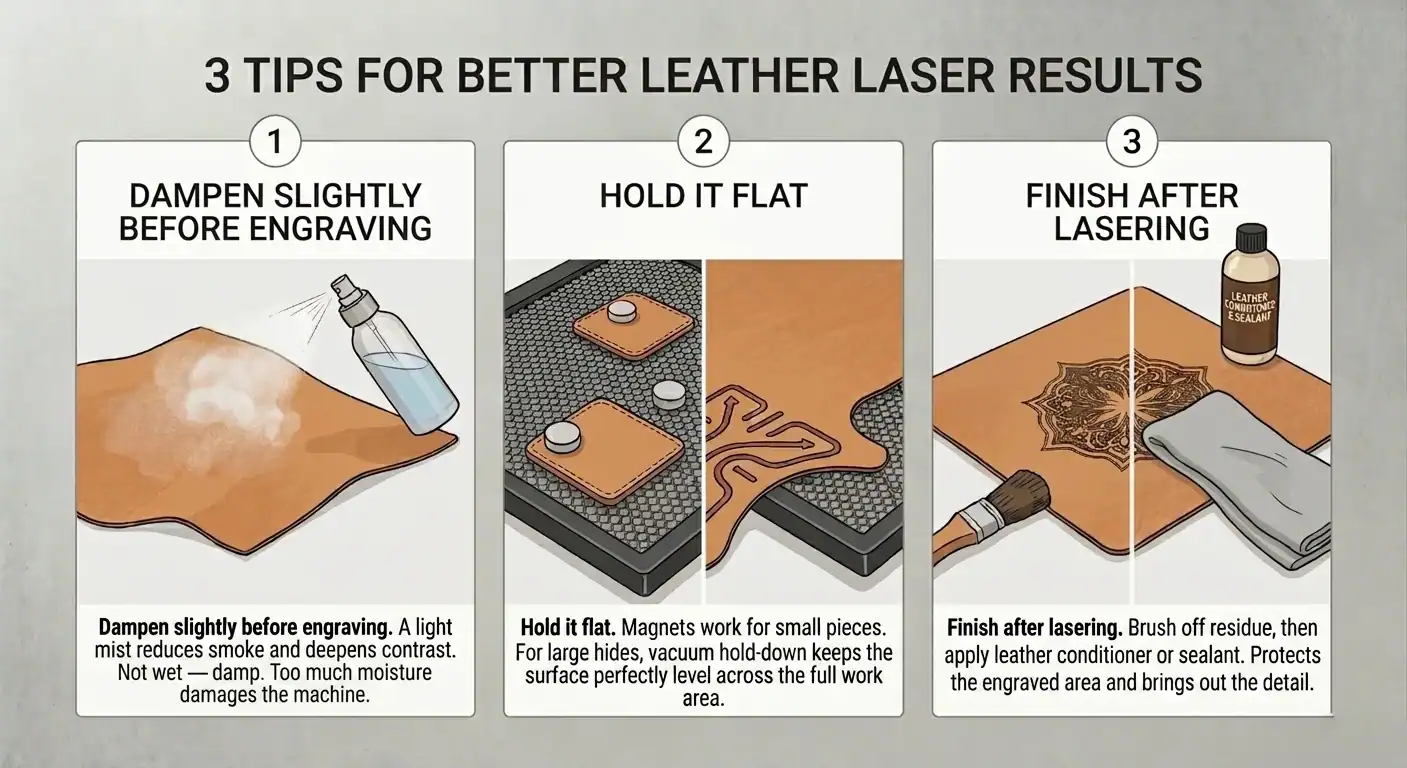
1. Dampen slightly before engraving
A light mist of water on the leather surface reduces smoke and deepens the contrast of the engraving. The key word is "damp" — not wet. Too much moisture can damage the machine or cause the leather to warp. A quick pass with a spray bottle is all you need.
2. Hold it flat
Leather that isn't lying flat on the laser bed will have inconsistent focus across the surface. For small pieces, magnets work well. For large hides, a vacuum hold-down system keeps the surface perfectly level across the full work area. Any bumps or curves affect the laser's focus and lead to uneven engraving depth.
3. Finish after lasering
Brush off the residue first, then apply leather conditioner or sealant. This protects the engraved area and brings out the detail. It's a simple step that separates professional products from hobbyist ones.
Pre-Flight Checklist for Flawless Engraving
Before you start a production run, go through this checklist. It eliminates the most common points of failure.
1. Choose the right material and laser
For engraving leather, a CO2 laser is the industry standard. Its 10,600 nm wavelength is readily absorbed by organic materials, producing a clean mark. Fiber lasers are designed for marking metals and are generally unsuitable for leather.
Lighter-colored, vegetable-tanned leathers provide the best contrast and most consistent results. If you're working with synthetic leather, verify it's PVC-free before you start.
2. Dial in your core settings
Power and speed have an inverse relationship. More power and slower speed equals a deeper, darker burn. Less power and faster speed results in a lighter touch.
- Power determines the depth of the engraving. Too much will burn through the leather.
- Speed determines how long the laser dwells on any point. Slower speeds create darker marks.
- Focus — an out-of-focus laser produces a wider, less-defined line. Always ensure the lens is perfectly focused on the leather's surface.
3. Prepare your artwork and workspace
Use high-resolution files (300 DPI or higher) to avoid pixelated or jagged edges. Before you start, make sure the leather is lying completely flat on the laser bed. Use weights, magnets, or tape to secure the edges if necessary.
How to Clean Leather After Laser Engraving
The engraving is finished, but the job isn't done. The surface around your design is covered in a smoky, sticky residue that dulls the appearance and feels unpleasant. Use the wrong cleaning method and you could smudge the soot into the grain, creating a permanent haze.
The gentle wipe-down
Start with a dry, soft brush or clean microfiber cloth to remove loose particles. Then use a cleaner specifically formulated for leather — or if you don't have one, a drop of very mild soap (like unscented dish soap) in a cup of distilled water works.
Dampen a clean cloth with your solution. Wring it out thoroughly — you want it almost dry. Wipe the surface soot away from the engraving, not into it. Don't scrub back and forth over the engraved lines, as this can drag soot and stain the surrounding leather.
Let it dry
After cleaning, let the leather air dry completely in a cool, dry place away from direct sunlight or heat. This can take a few hours. Rushing this step and applying conditioner to damp leather can trap moisture and lead to mildew.
Condition and protect
The laser process and cleaning can remove some of the natural oils from the leather. Once it's completely dry, apply a small amount of quality leather conditioner or oil (like Neatsfoot oil) to restore suppleness and provide a layer of protection. Apply a thin coat with a clean cloth, let it absorb, and buff off any excess.
Leather cleaning toolkit
| Tool / Product | Purpose | Best Practice |
|---|---|---|
| Soft brush / microfiber cloth | Removing loose soot, applying cleaners | Use separate cloths for cleaning and conditioning |
| Specialized leather cleaner | Safely removing smoke residue | Always test on a hidden spot first |
| Mild soap & distilled water | Accessible alternative cleaner | Use very little soap, well-wrung cloth |
| Leather conditioner / oil | Restoring moisture, protecting leather | Apply thin, even coat after leather is fully dry |
What Can You Make? Real Applications
Laser leather processing covers everything from fashion accessories to automotive interiors. Here are three real scenarios from workshops and factories that switched to laser.
Leather workshop: 200 to 800 pieces per month
A three-person leather workshop was producing 200 custom pieces monthly, all hand-cut. Complex patterns took 2 hours each by hand. After adding a Redshift 1610 (100W CO2), output jumped to 800+ pieces per month.
The change wasn't just speed. Complex pattern cutting went from 2 hours per piece to 5 minutes. Edge consistency eliminated rework entirely. Delivery time dropped from 14 days to 3 days. And they picked up a new revenue stream — corporate logo customization — that commands 40% higher average selling prices.

Footwear factory: 500 to 2,000 pairs per day
A sports shoe manufacturer ran punching and cutting as separate processes. After switching to a Redshift 1610G Galvo-Gantry hybrid, daily output surged from 500 to 2,000 pairs.
The galvo head perforates at 4,500 holes per minute — 10 times faster than mechanical punching. The gantry handles contour cutting at 0.1 mm accuracy. Both operations happen in one fixture, with no material handling between stations.

Vehicle customization shop: OEM-quality results, one car at a time
A vehicle interior customization shop in Kuwait hand-cut leather for dashboards, door panels, and steering wheels — each piece measured and trimmed per vehicle. After adding a Redshift 1610, every cut is now CNC-precise with zero waste on premium hides.
Digital templates for each car model mean no manual measuring and no cutting errors. Smart nesting reduces waste on expensive leather by 30%. The edges are heat-sealed with no fraying — matching factory interior quality.

Product examples
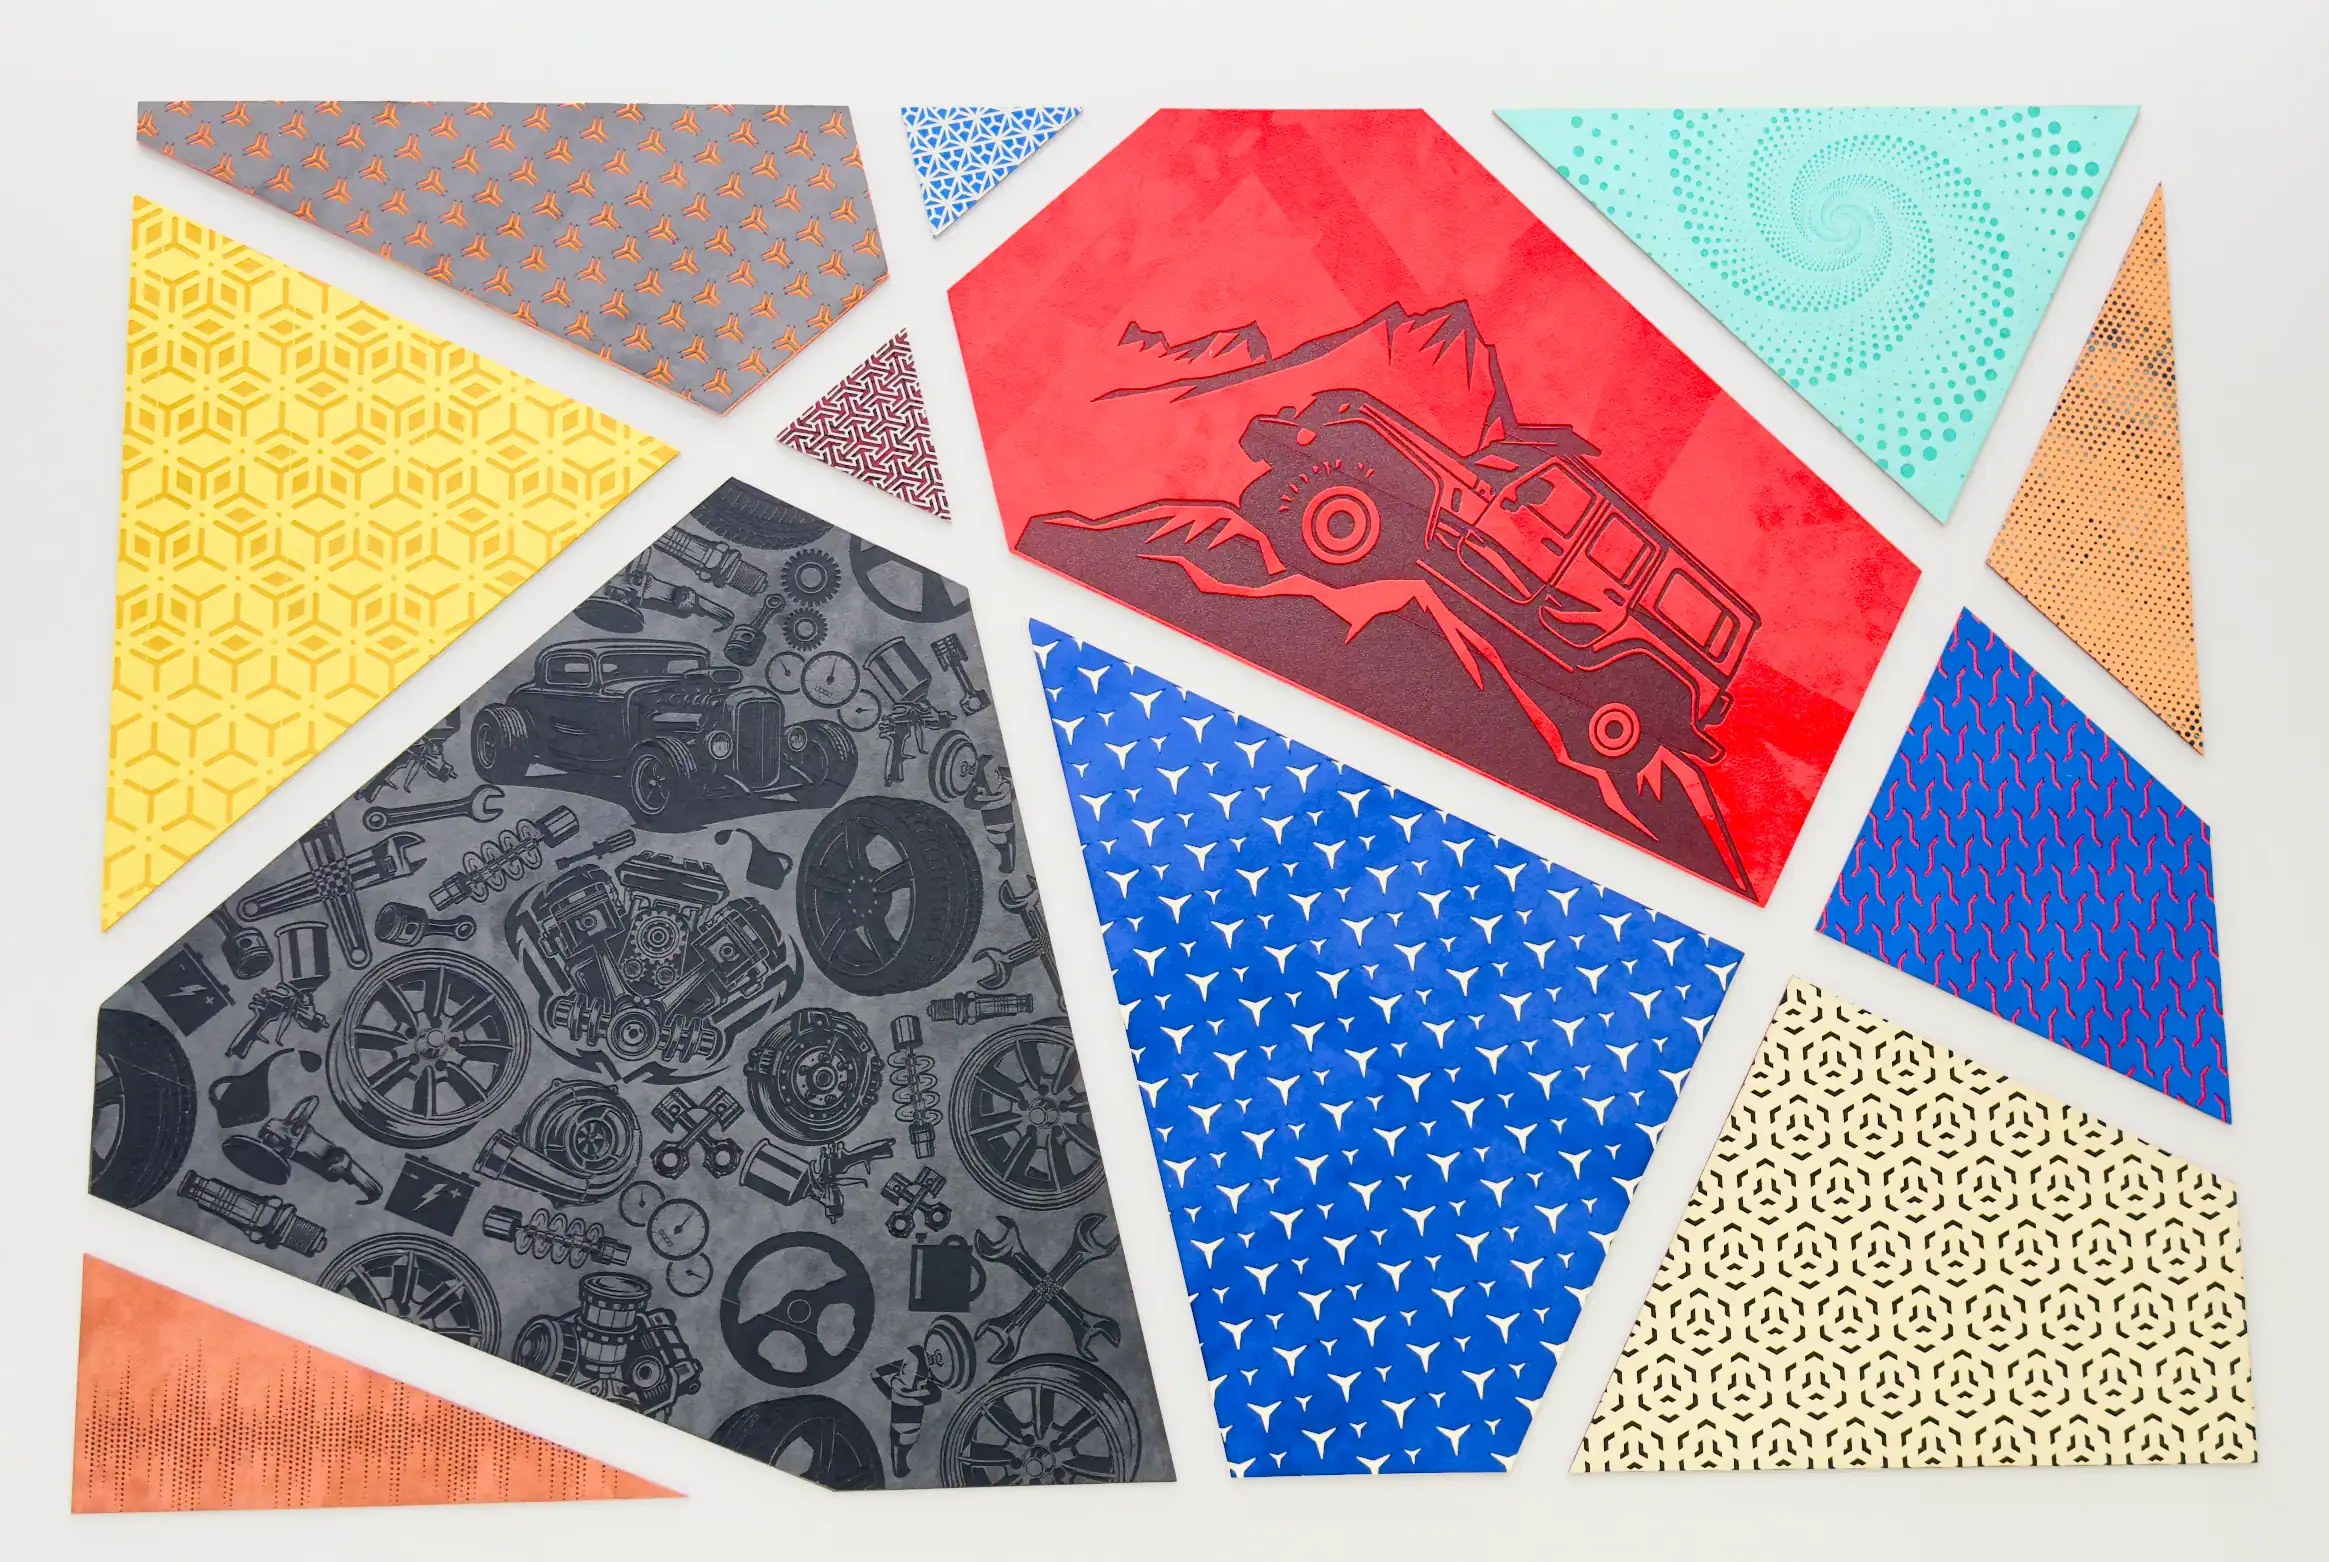
Laser-engraved leather covers a wide range of products:
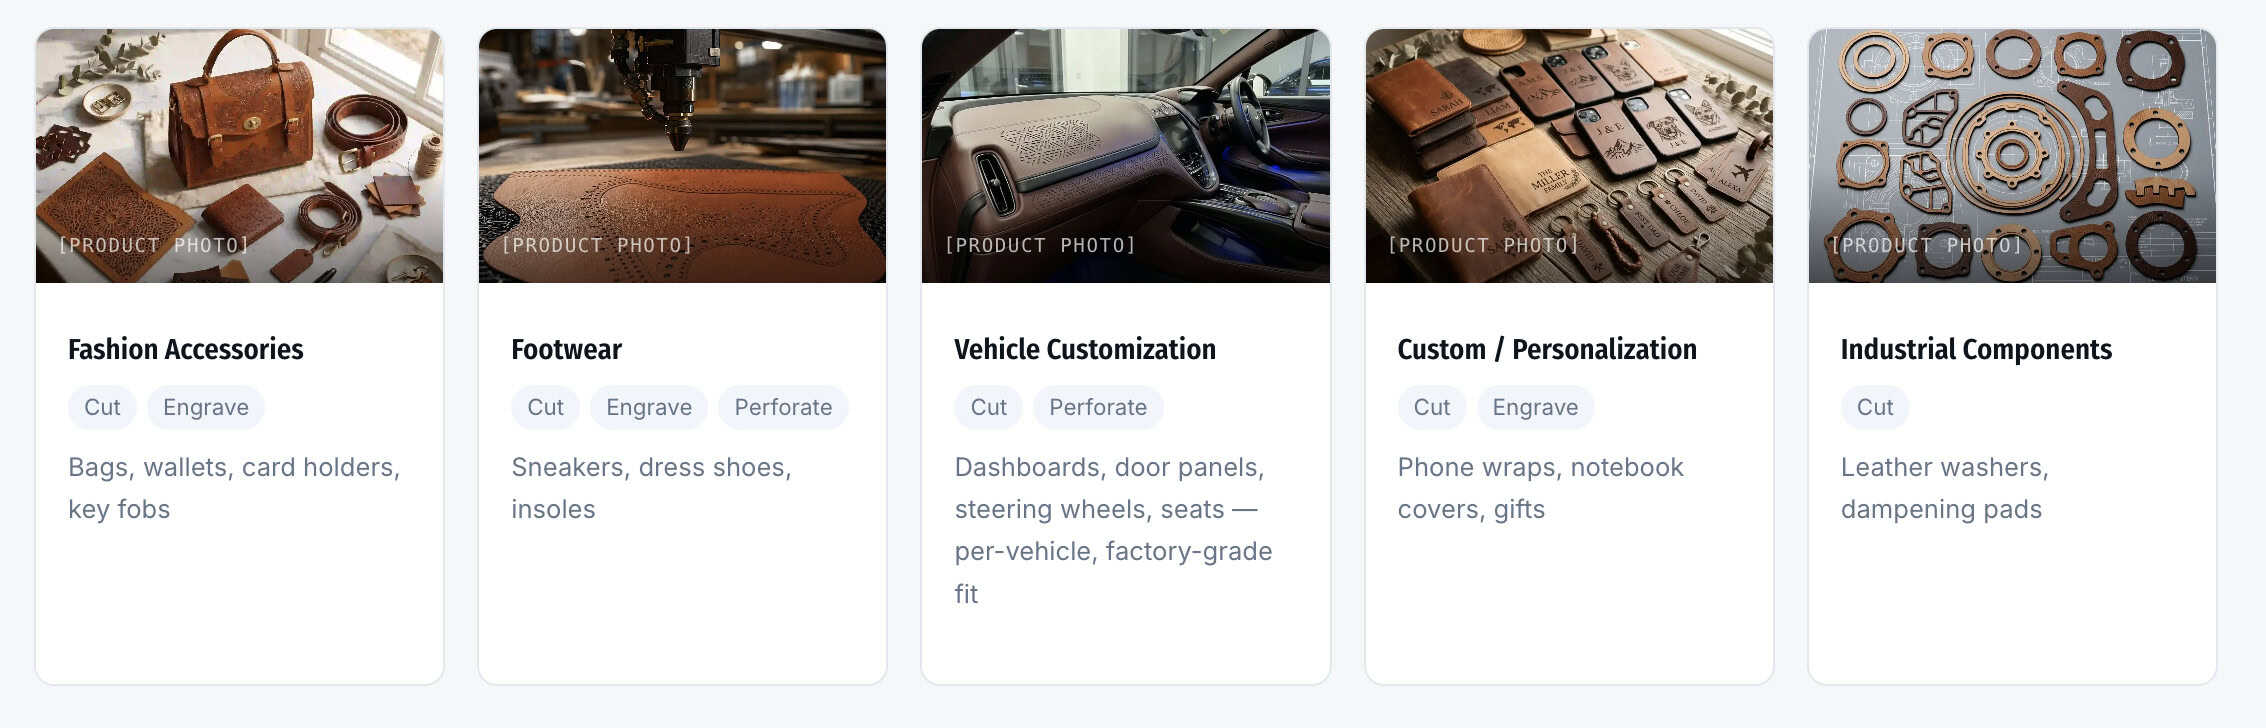
- Wallets and pouches — botanical patterns, monograms, logos
- Belts and bracelets — filigree designs, custom text
- Phone cases — intricate mandala and floral patterns
- Aprons and accessories — artisan branding, custom artwork
- Laptop sleeves — engraved patterns on faux leather
- Jewelry — earrings, brooches, pendants cut from leather sheets
Each piece can be produced individually or in large batches, with the same cost per unit regardless of quantity.
Find the Right Machine for Your Leather Work
The right machine depends on what you're making and how much you're making. Here's a quick decision framework.
Do you need to cut through the leather, or just engrave the surface?
Cutting (through-cutting, contour cutting, shape cutting) requires a laser cutter. Cutting machines can also engrave, but marking machines cannot cut.
Marking (logos, textures, serial numbers, decorative patterns on the surface) can be done with a marking machine, which is typically smaller and more affordable.
Cutting machines
| Category | Models | Work Area | Best For | Power | Key Advantage |
|---|---|---|---|---|---|
| Flatbed cutter | 1060 / 1390 / 1610 / 1810 | Up to 1800 × 1000 mm | Sheets and pieces, studio to factory | 60–150W | Flexible table options, MES-ready |
| Cutter + conveyor | 1610C / 1612C / 1614C / 1810C / 1812C / 1814C | Up to 1800 × 1400 mm | Roll materials, continuous production | 80–300W | Auto roll-to-roll feed + collection |
| Galvo & gantry hybrid | 1490G / 1610G / 1810G | Up to 1800 × 1000 mm | Perforation + cutting in one pass | 150–400W | 4,500 holes/min, dual-head system |
CO₂ Laser Cutter

Standard flatbed design for sheet and piece materials. Honeycomb, conveyor, or slat table options. Single or double head configurations with DSP control and MES system integration.
1060 · 1390 · 1610 · 1810
Area:up to 1800×1000mm Power:60–150W Speed:≤600mm/s cut
CO₂ Laser Cutter with Conveyor

Auto-feeder + conveyor belt + collection table for roll-to-roll production. Continuous feeding for textiles, synthetic leather, and flexible materials — minimal manual handling.
1610C · 1612C · 1614C · 1810C · 1812C · 1814C
Area:up to 1800×1400mmPower:80–300WFeed:Auto roll-to-roll
Galvo & Gantry Laser Machine

Dual-head system combining Galvo scanning (ultra-fast perforation, up to 4,500 holes/min) with Gantry motion (precise contour cutting). Perforate and cut in one pass — no process switching.
1490G · 1610G · 1810G
Area:up to 1800×1000mmPower:150–400WPerf.:4,500 holes/min
Marking machines
| Source Type | Models | Work Area | Best For | Power | Key Advantage |
|---|---|---|---|---|---|
| DC glass tube | 4545 / 6060 | 450×450 / 600×600 mm | Workshops, small production, budget-friendly | 100–450W | Lower cost, ~8,000 hr tube life |
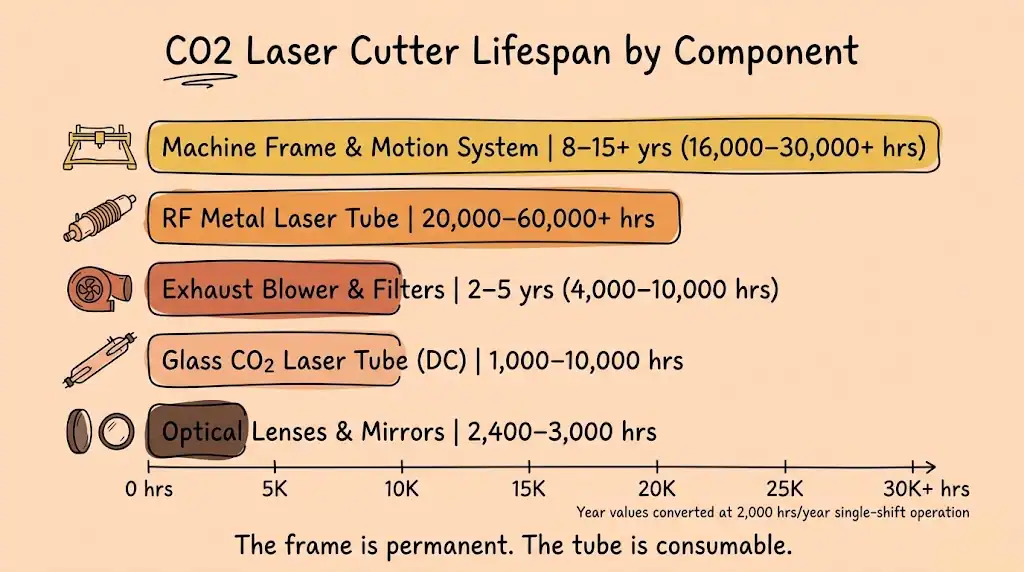
| RF metal tube | SG6060 | 600×600 mm | High-volume, precision marking, factory | 150 / 250 / 350W | 20,000+ hr lifespan, finer beam quality |
3D Dynamic Focus CO₂ Laser Marking Machine

Budget-friendly marking with DC glass laser tube. 3D dynamic focusing, ±0.01mm precision. Ideal for workshops, studios, and small factories working with leather, fabric, denim, wood, and acrylic.
4545 · 6060
Area:450×450 / 600×600mmPower:100–450WTube life:~8,000 hr
3D Dynamic Focus RF CO₂ Galvo Laser Marking Machine

Premium marking with Coherent RF metal laser tube. 20,000+ hr lifespan, finer beam quality. For high-volume or precision marking on leather, fabric, acrylic, PET, glass, and coated metal.
SG6060
Area:600×600mmPower:150 / 250 / 350WTube life:20,000+ hr
Which machine for which job?
Small workshop, custom pieces, budget-conscious? Start with a flatbed cutter (1390 or 1610) at 80–100W. This handles sheets and individual pieces, with enough power for most leather types.
Roll materials, continuous production? A cutter with conveyor system (1610C or 1810C) with auto-roll feeder minimizes manual handling and keeps production moving.
High-volume perforation + cutting? The galvo-gantry hybrid (1610G) does both in one pass. The galvo head perforates at 4,500 holes/min while the gantry handles contour cutting.
Marking only, no through-cut? A DC glass tube marker (4545 or 6060) is the budget option. For high-volume or precision marking, an RF metal tube marker (SG6060) offers 20,000+ hour lifespan and finer beam quality.
Frequently Asked Questions
What is the best laser and leather combination for engraving?
Use a CO2 laser (its 10,600 nm wavelength is absorbed by organic materials) with light-colored, vegetable-tanned leather. This combination gives you the highest contrast and the most consistent, clean engraving.
How can I make my engraving darker without burning the leather?
Instead of increasing power (which leads to brittle, ashy results), run multiple passes at a lower power setting. This builds up the dark carbon layer without overheating. You can also try slightly defocusing the laser by 1–2 mm to create a wider, darker line.
Is it safe to laser engrave all types of synthetic leather?
No. While PU leather can be engraved with caution (it tends to melt), never engrave PVC (Polyvinyl Chloride). PVC releases chlorine gas when heated — toxic to inhale and corrosive to your machine. Always verify the material's composition first.
Why does my engraving look blurry or have fuzzy edges?
Two common causes. First, check that the laser is perfectly focused on the leather surface — an out-of-focus beam creates a wide, indistinct line. Second, ensure your artwork is high-resolution (300 DPI or higher). Low-resolution images produce jagged or pixelated engraved lines.
Will laser engraving damage the leather?
Not with the right settings. The validated parameters vaporize only the surface layer — the underlying grain structure stays intact. Start with low power and high speed, then adjust gradually. Always test on a scrap piece first.
How long does it take to learn leather laser processing?
One day for basic operation. Most operators master the cleaning and finishing process in under an hour. The settings optimization takes more practice, but starting with validated parameters for your leather type shortens the learning curve significantly.
What accessories do I need beyond the laser machine?
Standard: thermostatic chiller, exhaust/filtration system, air compressor. Optional: auto-feeder for roll materials, CCD vision alignment for contour cutting, projector positioning for layout preview.
What warranty comes with the machine?
Core components: 2 years. Laser tube: 1 year (extended warranty available). On-site installation and training included for complex setups; online video training is standard.
Conclusion
Mastering CO2 laser engraving on leather comes down to three things: choosing the right material (vegetable-tanned leather gives you the best results), using controlled energy (not maximum power), and finishing properly (gentle cleaning + conditioning).
The validated parameters in this guide are starting points, not gospel. Every leather hide is slightly different — different tannin content, different oil levels, different thicknesses. Test on scraps from the same hide before committing to production.
If you're not sure about your material, send a sample for free testing. Get the parameters validated before you waste expensive leather on guesswork.