Skip to content
The allure of a custom laser-engraved leather product is undeniable, but so is the frustration when your results are inconsistent and disappointing. You envision a clean, crisp design, but instead, you get a smudged, burnt, or barely visible mark. This trial-and-error process wastes expensive material and valuable time, holding your projects back. But what if you could achieve consistently professional results by understanding a few key principles of how leather and lasers interact?
The secret to a perfect laser engraving on leather isn't just about the machine; it's about understanding the material itself. Success comes from a combination of choosing the right type of leather, using the correct laser settings for power and speed, and applying proper post-engraving cleaning techniques. By mastering these three areas, you can move from unpredictable outcomes to creating stunning, high-quality engraved leather goods every time.

I remember working with a new client, a purchasing manager named John, who was venturing into a line of premium engraved leather goods. His team kept getting requests for a "jet black" engraving and their approach was to simply crank the laser power to 100%. The results were disastrous—brittle, ashy messes that would flake off. He was frustrated. It was a great opportunity to share what I've learned over the years: you can't force a material to do what it's not chemically capable of. True mastery is about working with the leather, not against it. It's a lesson that has become central to how I guide all my partners.
How Can You Master Leather Laser Engraving with 10 Key Tips?
Are you tired of wasting leather on test runs that just don't work out? It can feel like you're just guessing with your laser settings, leading to inconsistent quality and frustration. You know your laser is capable of great things, but getting it to produce that perfect mark on leather seems like a dark art. The good news is, it's not art; it's a science, and following a clear set of guidelines can transform your results.
To master leather engraving, focus on three stages: preparation, execution, and finishing. First, always test your settings on a scrap piece of the same leather hide. Second, ensure your artwork is a high-resolution vector or bitmap file for clean lines. Finally, always start with low power and high speed, gradually adjusting to find the perfect "sweet spot" for the specific leather you are using. This methodical approach is the key to consistent success.

Your Pre-Flight Checklist for Flawless Engraving
Over my five years at Redshift Laser, I've consolidated countless projects and client conversations into a core checklist. Following these steps eliminates the most common points of failure I see.
1. Choose the Right Material and Laser
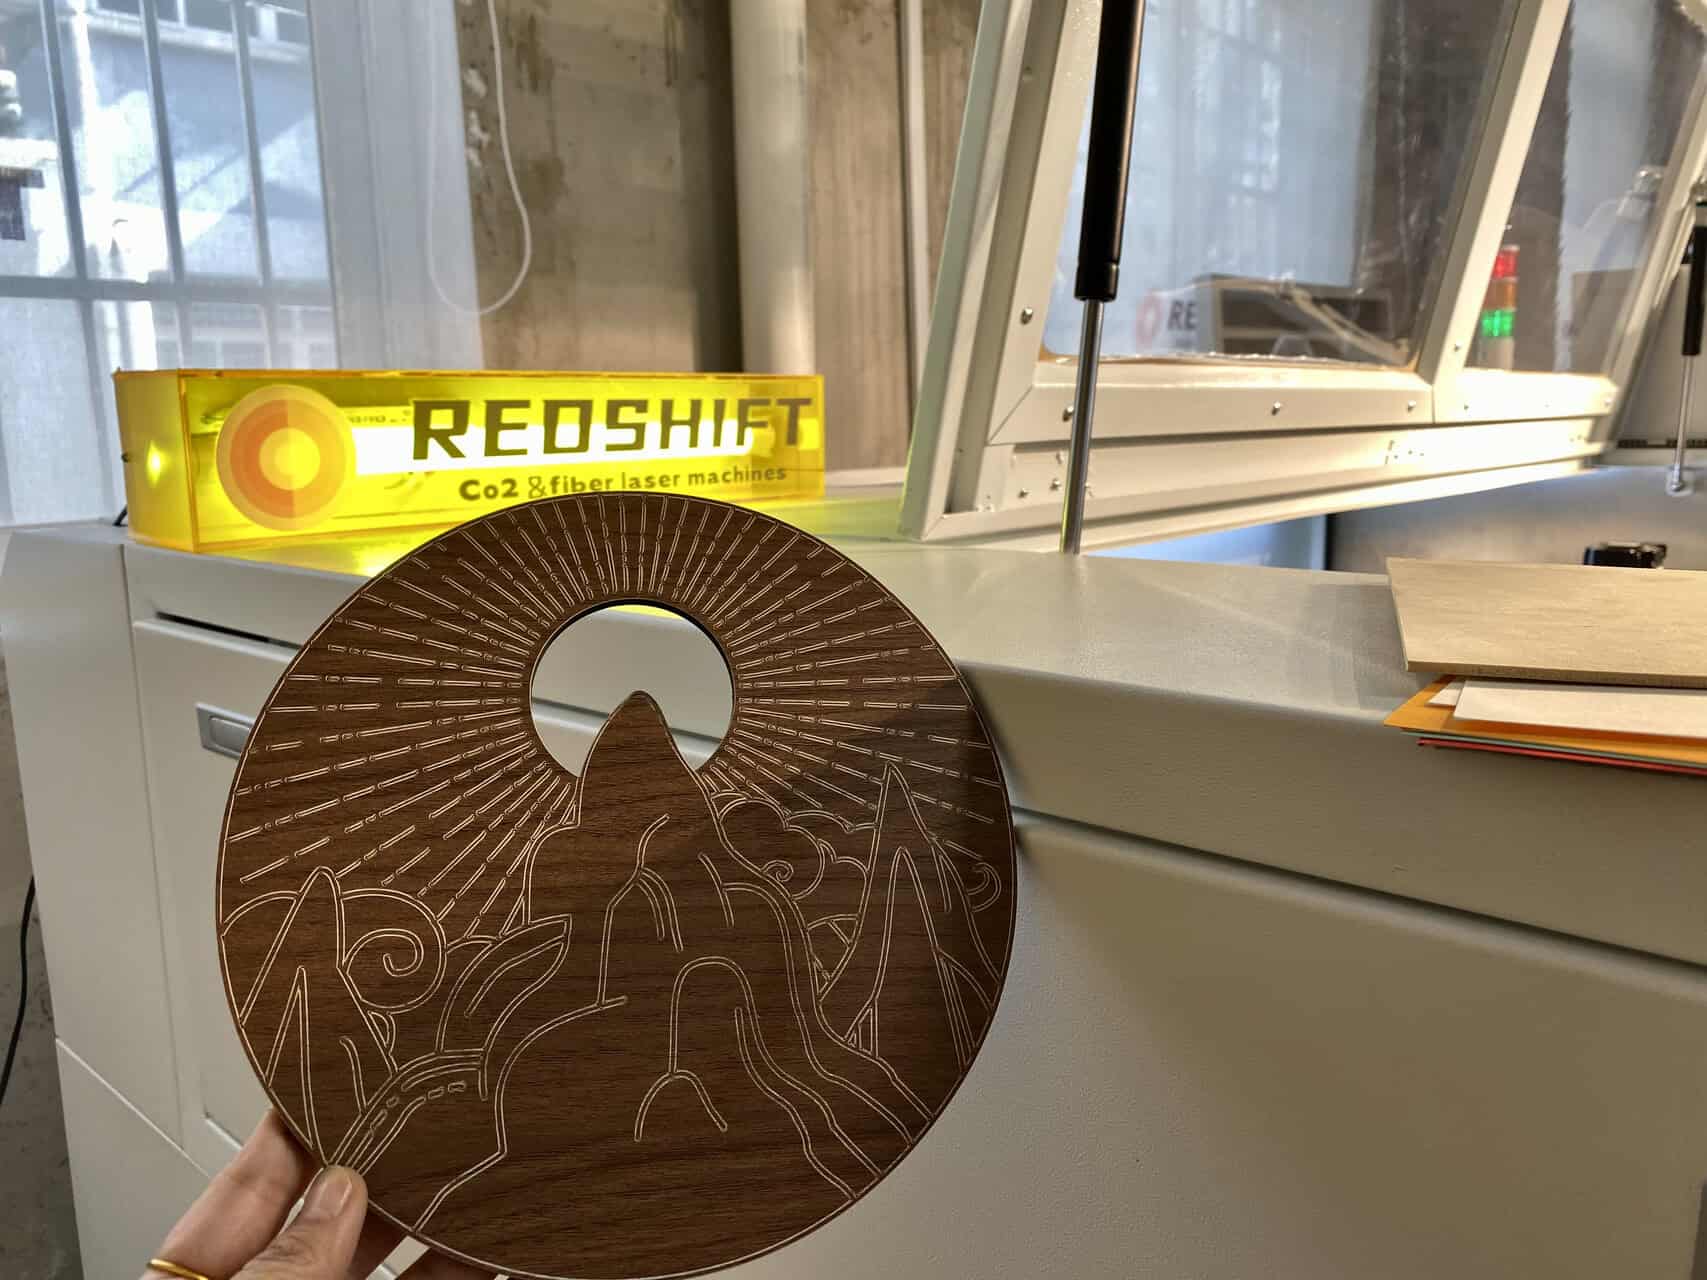
Not all leather is created equal, and not all lasers are suitable for it. For engraving leather, a CO2 laser is the industry standard. Its wavelength is readily absorbed by organic materials, producing a clean mark. Fiber lasers, on the other hand, are designed for marking metals and are generally unsuitable for leather. Lighter-colored, vegetable-tanned leathers often provide the best contrast and most consistent results.
2. Dial in Your Core Settings: Power, Speed, and Focus
This is where most mistakes happen. Think of power and speed as having an inverse relationship. More power and slower speed equals a deeper, darker burn. Less power and faster speed result in a lighter touch.
- Power: Determines the depth of the engraving. Too much power will burn through the leather.
- Speed: Determines how long the laser dwells on any point. Slower speeds create darker marks.
- Focus: An out-of-focus laser will produce a wider, less-defined line. Always ensure your laser lens is perfectly focused on the leather's surface.
3. Prepare Your Artwork and Your Workspace
A great engraving starts with great digital art. Use high-resolution files (300 DPI or higher) to avoid pixelated or jagged edges. Before you start, make sure the leather is lying completely flat on the laser bed. Any bumps or curves will affect the laser's focus and lead to inconsistent engraving depth. Use weights or tape to secure the edges if necessary.
Quick Settings Guide for CO2 Lasers (Starting Points)
| Leather Type | Laser Power | Engraving Speed | Notes |
|---|---|---|---|
| Vegetable-Tanned (Light) | 15-25% | 70-90% | Excellent contrast, start with low power. |
| Suede (Untreated) | 10-20% | 80-100% | Engraves very easily; use high speed to avoid scorching. |
| Synthetic/Faux Leather | 10-25% | 60-80% | Can melt or produce fumes; ensure good ventilation. |
| Oil-Tanned (Dark) | 25-40% | 50-70% | Requires more power for a visible mark. |
Note: These are starting points. Always test on a scrap piece first!
Why Isn't Your Leather Engraving Turning Jet Black?
The a number one request from clients is a deep, jet-black engraving. In pursuit of this, the common instinct is to maximize the laser's power, believing more power equals a darker mark. But this often backfires, leaving you with a brittle, ashy char that feels rough and can flake away. You're left with a damaged product and a confused client, wondering why a more powerful burn didn't work.
A laser doesn't "paint" black onto leather; it initiates a chemical reaction called carbonization. The final color is determined by the leather's composition—its tannins, oils, and dyes. Pushing the laser's power beyond the optimal point doesn't create a darker mark; it vaporizes the desirable carbon and turns the hide into worthless ash. The key to a dark, durable mark is using just enough energy to carbonize the material without overheating it.

The Science of a Dark Mark
This is the most important concept I teach clients like John. They see the laser as an unstoppable force, but it's a precision instrument. Understanding the "why" behind the process changed everything for his business.
1. Carbonization: The Sweet Spot
When the CO2 laser beam hits the leather, it heats the organic material. At the perfect temperature, the tannins and oils in the leather break down and release carbon. This carbon is what creates the dark, engraved mark. It's a controlled, chemical transformation. Think of it like toasting bread: there's a perfect point where it turns a rich brown. A little more, and you get black, burnt toast.
2. Overburning: Beyond the Sweet Spot
This is what happens when you use too much power. Instead of just releasing the carbon, the intense heat vaporizes it entirely or turns it into a fragile, flaky ash. This ash has no structural integrity and sits on top of a weakened, brittle piece of leather. It might look black initially, but it will quickly rub off, destroying the tactile quality and permanence of the product.
3. How to Achieve a Darker, Better Mark
Instead of increasing power, try these techniques:
- Multiple Passes: Run the same engraving job two or three times at a lower power setting. This builds up the carbonization layer by layer without overheating the leather.
- Adjust Frequency (PPI): On some machines, you can adjust the Pulses Per Inch (PPI). A higher PPI can sometimes create a darker appearance.
- Defocus the Laser: Slightly raising the laser's focus point (e.g., by 1-2mm) widens the beam. This can create a broader, darker mark without the harshness of high power.
Engraving Outcomes Based on Power Settings
| Setting | The Process | The Result | Tactile Feel |
|---|---|---|---|
| Low Power/High Speed | Light surface ablation | Light brown, tan mark | Smooth, minimal change |
| Optimal Power/Speed | Controlled Carbonization | Dark brown to near-black, clean mark | Smooth, slightly recessed |
| High Power/Low Speed | Overburning and combustion | Brittle, flaky ash on top | Rough, fragile, easily damaged |
Which Leather Works Best for Laser Engraving: Genuine or Synthetic?
You're ready to start a new project, but you're faced with a choice at the supplier: genuine leather or a more affordable synthetic leather. They can look and feel similar, but you know they'll react differently under the laser. Choosing the wrong one could lead to poor results, toxic fumes, or even damage to your machine. How do you decide which material is right for your job?
For the highest quality and best contrast, genuine vegetable-tanned leather is superior for laser engraving. Its natural composition results in a rich, dark brown mark without melting. Synthetic leathers, often made from plastics like PVC or PU, can also be engraved, but they require much more caution. They tend to melt rather than char, can produce harmful fumes, and the results may look less premium. Always verify the composition of synthetic leather before engraving.

A Material Showdown
Choosing the right material is half the battle. While cost is always a factor for a manager like John, I always stress that material suitability is directly tied to the final product's quality and, crucially, safety.
Genuine Leather
This is a broad category, but for laser work, we can simplify it.
- Vegetable-Tanned: The best choice. This leather is tanned using natural materials like tree bark. It engraves with beautiful, consistent contrast and is very durable. Lighter colors show the best results.
- Chrome-Tanned: This is the most common type of leather, used in upholstery and fashion. It contains chromium salts, which can be problematic. Engraving can release harmful compounds, and results are often less consistent than with veg-tanned leather.
- Oil-Tanned: This leather is infused with oils, making it soft and water-resistant. It can be engraved, but it requires more power, and the dark, oily surface often leads to low-contrast results.
Synthetic (Faux) Leather
These are man-made materials designed to mimic genuine leather.
- PU (Polyurethane) Leather: Can be laser engraved, but it melts. This requires careful power settings to avoid a sticky mess. The result is often a subtle, debossed effect with little color change.
- PVC (Polyvinyl Chloride) Leather: AVOID ENGRAVING PVC. When heated by a laser, PVC releases chlorine gas, which is extremely toxic to you and highly corrosive to the expensive metal parts inside your laser machine.
- Microfiber Leather: Higher-end synthetic materials can engrave well, often mimicking the results of genuine leather. As always, test first.
Genuine vs. Synthetic: Head-to-Head Comparison
| Feature | Genuine Leather (Veg-Tanned) | Synthetic Leather (PU/Microfiber) |
|---|---|---|
| Engraving Quality | Excellent. Rich contrast, clean lines. | Fair to Good. Tends to melt, less contrast. |
| Durability | Very High. Ages well. | Moderate. Can peel or crack over time. |
| Safety | Safe. Natural material. | Use Caution. Check for PVC. Always use ventilation. |
| Cost | Higher | Lower |
| Best For | Premium goods, high-contrast designs. | Budget projects, prototyping, items with less handling. |
How Do You Properly Clean Leather After Laser Engraving?
Your engraving is finished, but the job isn't done. The surface around your beautiful design is covered in a smoky, sticky residue that dulls the appearance and feels unpleasant. If you use the wrong cleaning method, you could smudge this soot into the grain of the leather, creating a permanent haze, or even damage the leather itself with harsh chemicals.
To properly clean laser-engraved leather, you need a gentle approach. The best method is to use a soft cloth or microfiber towel slightly dampened with a specialized leather cleaner or a simple solution of mild soap and water. Gently wipe away the residue, moving away from the engraved area to avoid pulling soot into it. Always allow the leather to air dry completely before applying any conditioners.

The Post-Production Polish
A clean finish is what separates a professional product from a hobbyist one. That sooty residue is a byproduct of the carbonization process, and removing it correctly is a critical final step.
1. The Gentle Wipe-Down
The key here is "gentle." You're not trying to scrub the leather.
- Start Dry: Use a dry, soft brush (like a mushroom brush) or a clean microfiber cloth to brush away any loose particles first.
- Choose Your Cleaner: For most leathers, a cleaner specifically formulated for leather is best. If you don't have one, a drop of very mild soap (like unscented dish soap) in a cup of distilled water works. Avoid harsh household cleaners, alcohol, or acetone, as they will dry out and damage the leather.
- Damp, Not Wet: Lightly dampen a clean cloth with your solution. Wring it out thoroughly. You want it to be almost dry.
- Wipe Strategically: Wipe the surface soot away from the engraving. Don't scrub back and forth over the engraved lines, as this can drag the soot and stain the surrounding leather.
2. Let It Dry
Patience is essential. After cleaning, let the leather air dry completely in a cool, dry place away from direct sunlight or heat. This can take a few hours. Rushing this step and applying a conditioner to damp leather can trap moisture and lead to mildew.
3. Conditioning (Optional but Recommended)
The laser process and cleaning can remove some of the natural oils from the leather. Once it's completely dry, applying a small amount of a quality leather conditioner or oil (like Neatsfoot oil) restores its suppleness and provides a layer of protection. Apply a thin coat with a clean cloth, let it absorb, and buff off any excess.
Leather Cleaning Toolkit
| Tool / Product | Purpose | Best Practice |
|---|---|---|
| Soft Brush / Microfiber Cloth | Removing loose soot and applying cleaners/conditioners. | Use separate cloths for cleaning and conditioning. |
| Specialized Leather Cleaner | Safely removing smoke residue without drying out the hide. | Always test on a hidden spot first. |
| Mild Soap & Distilled Water | An accessible alternative cleaner. | Use very little soap and a well-wrung cloth. |
| Leather Conditioner/Oil | Restoring moisture and protecting the leather. | Apply a thin, even coat after the leather is fully dry. |
Conclusion
Mastering the art of laser engraving leather comes down to respecting the material and understanding the process. It begins with choosing the right leather—preferably vegetable-tanned—and the right tool, a CO2 laser. Success is not found by overpowering the leather to get a black mark, but by using controlled energy to achieve a clean, dark carbonization. By following key tips, testing your settings, and finishing with proper cleaning and conditioning, you can consistently produce the high-quality, durable, and beautiful results your clients expect. This thoughtful approach transforms laser engraving from a game of chance into a reliable craft.
Frequently Asked Questions
1. What is the best laser and leather combination for engraving?
For the best results, you should use a CO2 laser, as its wavelength is perfectly suited for organic materials. The ideal leather to pair with it is a light-colored, vegetable-tanned leather. This combination provides the highest contrast and the most consistent, clean engraving.
2. How can I make my engraving darker without burning the leather?
Instead of increasing the power, which leads to a brittle, ashy result, try two professional techniques. First, run multiple passes at a lower power setting. This builds up the dark carbon layer without overheating the hide. Second, you can try slightly defocusing your laser by 1-2mm to create a wider, darker line without the harshness of high power.
3. Is it safe to laser engrave all types of synthetic/faux leather?
No, absolutely not. While some synthetics like PU leather can be engraved with caution (they tend to melt), you must never engrave any material containing PVC (Polyvinyl Chloride). When heated, PVC releases chlorine gas, which is toxic to inhale and highly corrosive to the metal components of your laser machine. Always verify your material's composition first.
4. Why does my engraving look blurry or have fuzzy edges?
This is typically caused by one of two issues. First, check that your laser is perfectly focused on the surface of the leather; an out-of-focus beam will create a wide, indistinct line. Second, ensure your artwork is a high-resolution file (300 DPI or higher). A low-resolution image will result in jagged or pixelated engraved lines.
5. What's the best way to clean the soot off the leather after engraving?
The key is a gentle approach. First, use a soft, dry brush to remove any loose particles. Then, use a microfiber cloth lightly dampened with a specialized leather cleaner or a mild soap and water solution. Gently wipe the residue away from the engraved area, not into it. Never use harsh chemicals like alcohol, as they will dry out and damage the leather.